 Arduino(傾儖僪僁僀乕僲)墘廗嶲徠傾僪儗僗
丂Arduino(傾儖僪僁僀乕僲)墘廗偼壓婰偺傾僪儗僗傪嶲徠偟傑偡丅
https://www.arduino.cc/en/Tutorial/HomePage
Communication/SerialEvent偺夞楬恾丂僷僜僐儞偲偺USB愙懕偺傒偲側傝傑偡丅
Communication/SerialEvent偺僗働僢僠乮侾乯儊僯儏乕偺乽僼傽僀儖乿丵乽僗働僢僠偺椺乿丵乽Communication乿丵乽SerialEvent乿偱埲壓偺僗働僢僠偑愝掕偝傟傑偡丅
  Serial Event example

 When new serial data arrives, this sketch adds it to a String.
 When a newline is received, the loop prints the string and
 clears it.

 A good test for this is to try it with a GPS receiver
 that sends out NMEA 0183 sentences.

 Created 9 May 2011
 by Tom Igoe
 This example code is in the public domain.
 http://www.arduino.cc/en/Tutorial/SerialEvent
 */

String inputString = "";         // a string to hold incoming data
boolean stringComplete = false;  // whether the string is complete

void setup() {
  // initialize serial:
  Serial.begin(9600);
  // reserve 200 bytes for the inputString:
  inputString.reserve(200);
}

void loop() {
  serialEvent(); //call the function
  // print the string when a newline arrives:
  if (stringComplete) {
    Serial.println(inputString);
    // clear the string:
    inputString = "";
    stringComplete = false;
  }
}

/*
  SerialEvent occurs whenever a new data comes in the
 hardware serial RX.  This routine is run between each
 time loop() runs, so using delay inside loop can delay
 response.  Multiple bytes of data may be available.
 */
void serialEvent() {
  while (Serial.available()) {
    // get the new byte:
    char inChar = (char)Serial.read();
    // add it to the inputString:
    inputString += inChar;
    // if the incoming character is a newline, set a flag
    // so the main loop can do something about it:
    if (inChar == '\n') {
      stringComplete = true;
    }
  }
}
Communication/SerialEvent偺幚峴乮侾乯儊僯儏乕偺乽僗働僢僠乿丵乽儅僀僐儞儃乕僪偵彂偒崬傓乿偱彂崬傒偝傟丄幚峴偝傟傑偡丅
乮俀乯儊僯儏乕偺乽僣乕儖乿丵乽僔儕傾儖儌僯僞乿傪慖戰偡傞偲僔儕傾儖儌僯僞偑昞帵偝傟傑偡丅
乮俁乯僔儕傾儖儌僯僞偵俴俥偺傒傪愝掕偟傑偡丅
乮係乯僔儕傾儖儌僯僞偺憲怣僥僉僗僩儃僢僋僗偵乽Arduino乿傪愝掕偟傑偡丅
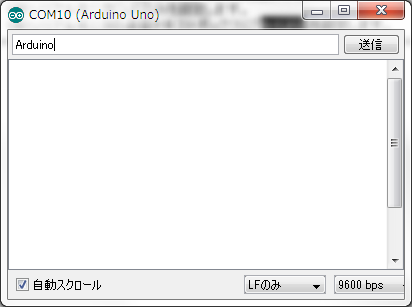
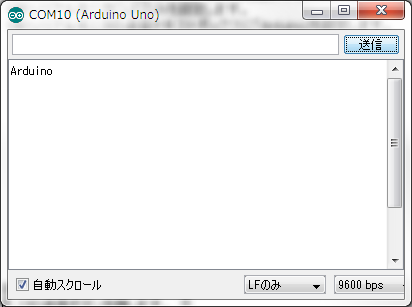
乮俆乯憲怣儃僞儞傪墴偟傑偡丅
乮俈乯乽Arduino乿偑庴怣偝傟傑偡丅
 Communication/SerialEventl傑偲傔
乮侾乯Serial捠怣偺婎杮宍偱偡丅
 侾俆復丗Arduino(傾儖僪僁僀乕僲)墘廗乮Communication/SwitchStatementSerialInput曇乯偵峴偔丅