 Arduino演習Communication/Graph用スケッチ
標準のArduino演習Communication/Graph用スケッチはうまく動作しませんでした。
修正後のArduino演習Communication/Graph用スケッチは以下となります。
// Graphing sketch
 import processing.serial.*;
 Serial myPort;        // The serial port
 int xPos = 1;         // horizontal position of the graph

 void setup ()
 {
   // set the window size:
   size(400, 300);
   // List all the available serial ports
   // if using Processing 2.1 or later, use Serial.printArray()
   println(Serial.list());

   // I know that the first port in the serial list on my mac
   // is always my  Arduino, so I open Serial.list()[0].
   // Open whatever port is the one you're using.
   myPort = new Serial(this, Serial.list()[4], 9600);

   // don't generate a serialEvent() unless you get a newline character:
   myPort.bufferUntil('\n');

   // set inital background:
   background(0);
 }

 void draw ()
 {
   if(myPort.available()>16 )//受信データが16バイト以上の場合
   {
     String inString = myPort.readString();//受信バッファを全部読む
     String[] s =splitTokens(inString);//文字列をスペース、改行等で分離
     inString = trim(s[1]);//2番目のデータの空白を除去
     float inByte = float(inString);//実数型に変換
     inByte = map(inByte, 0, 1023, 0, height);
     stroke(127,34,255);//線の色
     line(xPos, height, xPos, height - inByte);//線を引く
     if (xPos >= width)
     {
       xPos = 0;
       background(0);
     }
     else
     {
       xPos++;
     }
   }
 }
PArduino演習Communication/Graph用スケッチの実行(1)PArduino演習Communication/Graph用スケッチを実行するとコンソールに
COM1 COM3 COM4 COM5 COM10
と表示されます。
(2)Arduinoと接続のポートはいつもCOM10であり、port = new Serial(this, Serial.list()[4], 9600);とするとつながります。
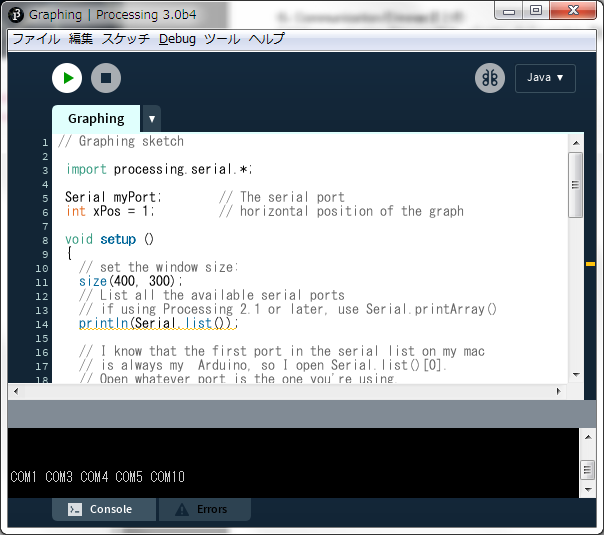
(4)実行ウインドウが表示されます。
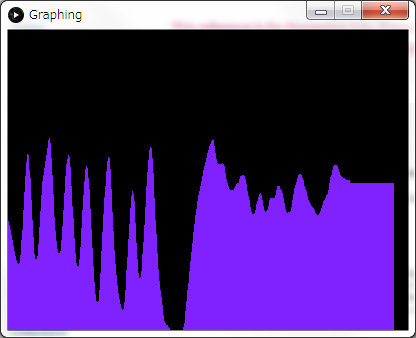
(5)Arduinoボードに接続したボリュウムを回すと以下のようなグラフとなります。
 Arduino演習Communication/Graph用スケッチまとめ
(1)標準のArduino演習Communication/Graph用スケッチはうまく動作しませんでした。
(2)厳密な原因はよくわかりませんが、送信サイクルが早いため、受信処理が間に合わないためと思われます。
(3)対策として、受信処理開始は受信バッファに16バイト以上データがたまったときとしました。
(4)受信バッファのデータは一括で読出しとしました。
(5)受信データの2番目の文字列のみをグラフに使用するようにしました。
 4章:Arduino演習Communication/Physical Pixel用スケッチに行く。